Wednesday, February 27, 2013

Puff the Magic Pancake

Know what I love?  Making something that's pretty easy but that looks AMAZING and totally wows your guests.  That's what this German pancake will do.  As the pancake bakes in the oven, it slowly puffs up.  Children and even adults will have fun checking in on it and seeing how big it expands.  As you take it out and let it cool, it settles down into a unique shape.  Its pretty fun to make...and pretty delicious too!


German Pancake
From Chop Chop Mag

Ingredients:
1 T unsalted butter
1 T olive oil
6 large eggs
1 c milk
1/2 t vanilla
1 c all-purpose flour
1/4 c toasted wheat germ
1/4 t salt

Preheat oven to 450 degrees.  Add butter and oil into 10 inch ovenproof skillet and put skillet in the oven while preheating.  Stir eggs in large bowl until light and frothy.  Add milk, vanilla, flour, wheat germ, and salt.  Stir until well blended.  Remove the skillet and swirl the butter/oil to coat the bottom and sides.  Pour the batter into the skillet and return to oven.  Bake for approx. 20 minutes - it will get very puffy and golden brown.  Cool briefly and add toppings of choice (fruit, nuts, whipped topping, maple syrup, chocolate syrup, CARAMEL, heck...we even thought that this could be a lunch/dinner item and you can add meat/potatoes/veggies/gravy to it...endless possibilities!).

If you make this - please share a pic on the Caramel Living FB page!  Its fun to see the final characteristics.

Tuesday, February 26, 2013

Salted Caramels


Let the streamers and balloons fall! I did it, I did it. Excuse me while I take a bow.

Okay... hold your applause.

It took me three times, but I finally showed those caramels who is boss. As I stated in a previous post, the first batch was a waste, the second batch was used to make Cookie Caramel Brownies.

This recipe comes from Play With Your Food. Thank you PWYF! I encourage everyone to go "like" the page!

I changed nothing in the recipe:

1 cup heavy cream
5 tablespoons unsalted butter, cut into pieces
1 teaspoon fleur de sel (sea salt)
1 1/2 cups sugar
1/4 cup light corn syrup
1/4 cup water

Line bottom of 8 x 8 baking pan with parchment paper, then lightly oil the parchment.

Bring cream, butter and fleur de sel to a boil in a small saucepan. Remove from heat and set aside.

Boil sugar, corn syrup, and water in a heavy saucepan, stirring until sugar is dissolved. Boil without stirring (gently swirl) until mixture is light golden caramel color. Remove from heat.

Carefully stir in cream mixture -- IT WILL BUBBLE UP. Simmer, stirring frequently, until caramel reaches 248 F on a thermometer (10 minutes). Pour into baking pan and cool 2 hours. Cut into 1 inch pieces and wrap in wax paper.

These caramels are being are shipped out. We held a small contest awhile back and the lucky winners will be receiving them soon. We do hope you enjoy the caramels. A lot of love was put into making them ;)


Monday, February 25, 2013

Cookie Caramel Brownies


Here’s what I know… making caramel squares is not my calling. Yikes! These puppies are hard to make. Last weekend, I attempted them twice. Twice I failed. The first was a complete waste. The second batch I was able to save. They were too soft to wrap but I knew I could find a use for it.

I should be able to make caramel if we’re going to unintentionally promote it. As we’ve said before, we didn’t name our blog “Caramel Living” because we have an obsession with caramel.

Last week I contemplated how I would use this too-soft caramel. I had several thoughts… pancakes, ice cream, caramel apple pizza (a recipe provided at our caramel party) and so on and so forth. I was suddenly excited to bake something with this caramel. 

I decided on making a combination of bars. One half would be brownie. The other half would be chocolate chip cookie. A layer of caramel would divide them. The rest is history.


Brownies (Adapted from: Allrecipes):
*you can also use Cara's recipe

2 sticks melted butter
1 ½ C white sugar
2 tsp vanilla
3 eggs
1 C flour
2/3 C unsweetened cocoa
½ tsp baking powder
½ tsp salt

Mix together butter, sugar and vanilla. Next add eggs, one at a time, mixing in between. Set aside.
Combine flour, cocoa, baking powder and salt. Gradually mix flour mixture into butter mixture.

Preheat oven to 350°. Grease 9x13 baking pan. Spread the brownie mix evenly into the pan. Set aside.

Spread brownie dough

Let’s get the cookies dough ready.

Cookies:

I cut my normal recipe in half.

1 1/3 C flour
½ tsp baking soda
½ tsp salt
Just under ½ C white sugar
Just under ½ C brown sugar
1 stick of unsalted butter, softened
½ tsp vanilla
1 egg
½ - ¾ C chocolate chips

Combine flour, baking soda and salt. Set aside
Mix together white sugar, brown sugar and butter. Next add vanilla and mix. Add egg and mix. Add chocolate chips and mix. Gradually mix flour mixture into the sugar mixture.

For the caramel sauce, try Cara’s homemade recipe.

Now it’s time to bring it all together. If your caramel is thick, warm it just enough to make it easy to pour over the brownie mix. I warmed mine for about 35 seconds.

Pour caramel over brownie dough

Now let’s add the cookie dough. I took a handful of the dough and used my hands to gently pull and press it out (before adding it to the pan). Next I laid the dough throughout the pan, leaving caramel rivers here and there.

Lay cookie dough over caramel

Bake the bars for 30-40 minutes.
Let cool completely (or you will burn your mouth off like I did) then devour.

Tuesday, February 19, 2013

National Mint Chocolate Day

My writing here is NOT going to knock your socks off because I'm supposed to be working but I JUST heard that it was National Mint Chocolate Day and I just HAD to post one of my favorite mint chocolate recipes.   I adore anything mint and chocolate so I can't believe I didn't have this very special day in my calendar (that's been remedied now).  Citizens of Earth...feast your eyes on this bar...


Creme de Menthe Bars
First Layer
1 c. sugar
1 c. flour
1/2 c. butter
4 eggs
1 can chocolate syrup (like Hershey's)

Mix ingredients and spread on 10x15 jelly roll pan or 9x13 pan.  Just be sure the sides are a few inches tall because these brownies are thick, especially the smaller the pan.  Bake at 350 degrees for 20-25 minutes.  Let cool completely.

Second Layer
1/2 c. butter
1 tsp peppermint extract
4 c. powdered sugar
few drops green food coloring
1-2 T milk

Mix and spread over brownie layer.  Heat or add milk if the frosting isn't soft enough to spread easily.  Cool completely.

Third Layer
12 oz. chocolate chips (I prefer semi-sweet)
1/2 c. butter


Melt together and spread over top of mint frosting layer.  Let cool.  Cutting the bars is easiest/neatest before the top layer hardens completely.

Enjoy!


Monday, February 18, 2013

Grilled Honey Mustard Turkey Sandwich


The more I dive into this amateur chef gig, the more I learn how easy it is to make things from scratch. Homemade is SO much better than store bought. 

I love sandwiches full of messy goodness. My first thought was to make a turkey sandwich with chipotle mayo, but then I decided I was in the mood for honey mustard. I’m female… I change my mind, it’s totally acceptable. 


First, I headed to Allrecipes and found a base honey mustard. Again, I’m kind of a rebel and don’t always like to follow directions. The recipe I found called for mayo, Dijon mustard and honey. Boring! But it was a great recipe to get me started.

Personally, the mayo this recipe calls for is overwhelming, you may want to reduce it if you are making a smaller batch. I started out using just Dijon mustard, but quickly decided I needed to add yellow mustard too. I slowly increased the amount of mustards until it reached MY mustard standards. Depending on how much of a mustard taste you want, you may want to add more mustard or even take some away. The mustard this recipe calls for isn’t overwhelming by any means.
Experiment a bit.

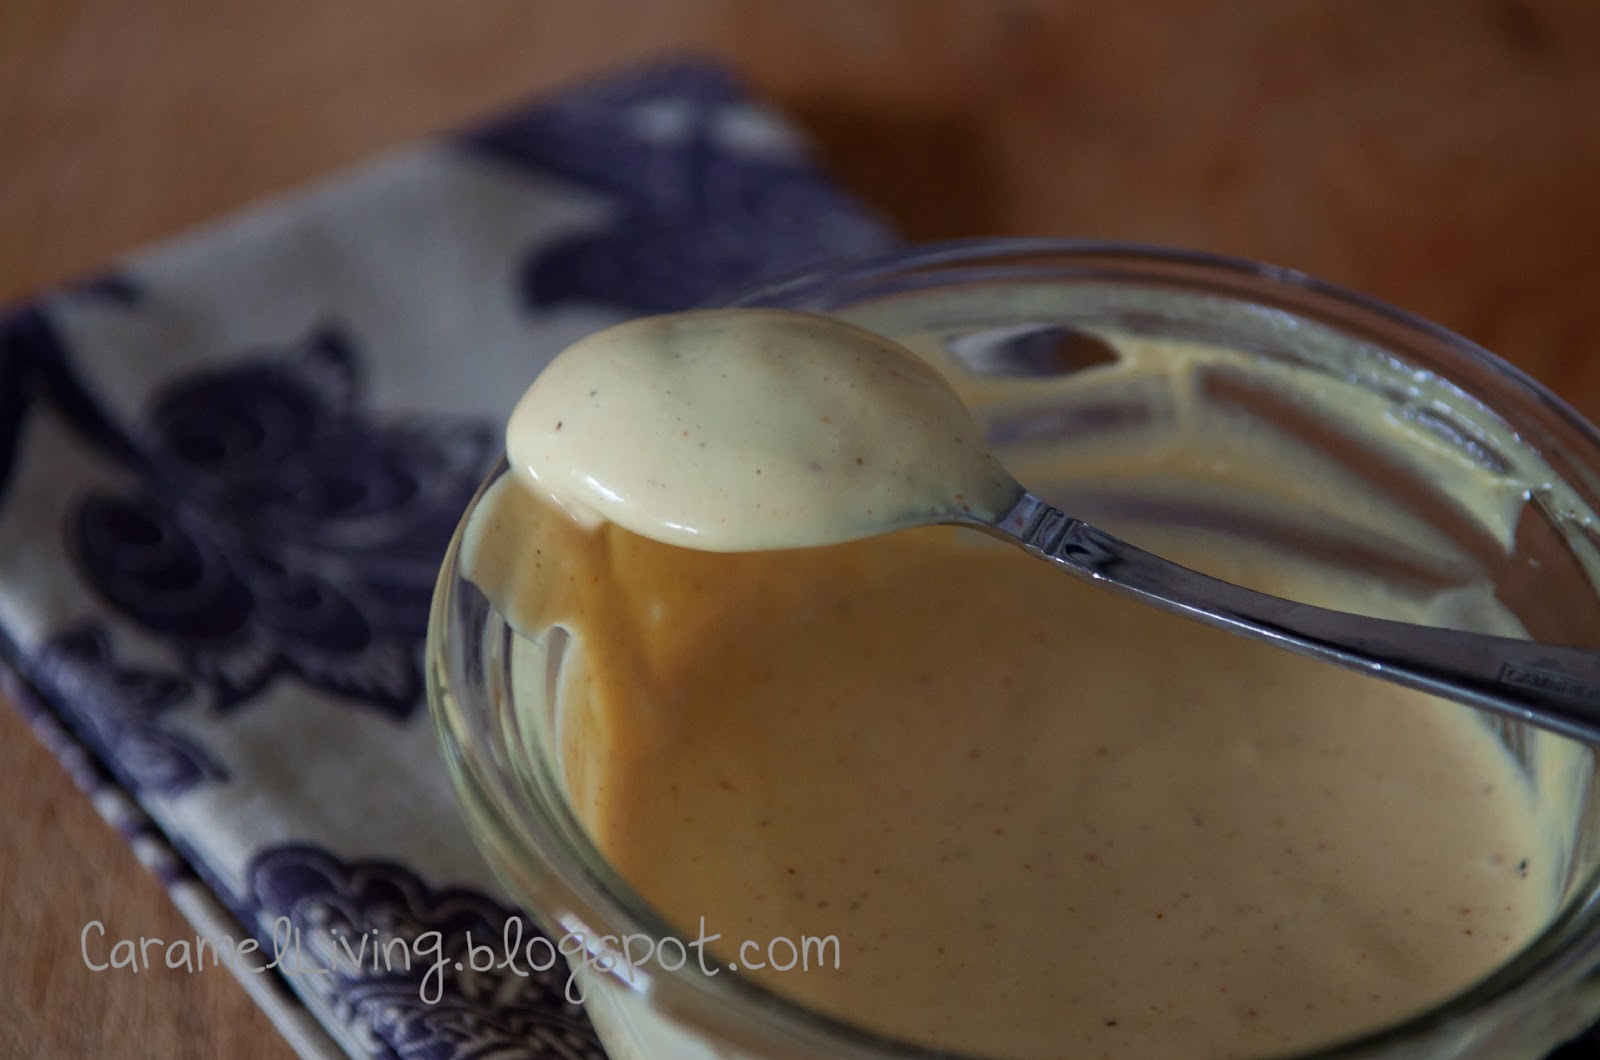
Homemade Honey Mustard

  • ½ cup Mayonnaise
  • 1 ½ tsp. Honey
  • 1 ½ tbsp. Dijon Mustard (Pardon me, do you have any Grey Poupon?)
  • 1 ½ tbsp. Yellow Mustard
  • ½ tsp. Cheyenne Pepper
  • ¼ tsp. Ground Cumin
  • ½ tsp. Black Pepper

Stir together mayo, honey, Dijon mustard and yellow mustard. Add spices and stir. Uh… can you say easy?


Makes about 2/3 cup of honey mustard. 

Let’s add this delicious honey mustard to a kick tush grilled turkey sandwich!

Grilled Honey Mustard Turkey Sandwich
  • Deli Turkey
  • Choice of cheese (provolone melts nicely)
  • Italian Bread Loaf (cut to the thickness you desire)
  • Onions, green or red peppers, mushrooms (add or take whatever veggie you’d like)
  • Honey Mustard from scratch
  • A bit of butter (to butter the bread)


Saute the veggies in 1/2 tbsp of olive oil or sprinkle water on them from time to time. While the veggies cook, prepare 2 slices of bread by spreading a light layer of butter on one side of each slice. This side will be the outside of the sandwich and will go directly onto the skillet. 


On the opposite side of one slice, spread a fairly generous amount of the homemade honey mustard. 


Add turkey, cheese, sauteed veggies, turkey and cheese (in this order) on top of the honey mustard. On the other slice of bread, spread some more honey mustard and add it, honey mustard side down, to the sandwich. 


Turn burner to medium-low and put the sandwich into the skillet, buttered sides should be on the outside. We want the insides to get warm, but we don’t want to burn the bread so don’t cook it too fast. After 4-5 minutes, slowly and ever so carefully flip the sandwich. It will require both hands. One hand using the spatula and other hand guiding the sandwich as you flip it. Cook for another 4-5 minutes. 


It’s a big sandwich and we want the insides to be warm and the cheese to be melty. You may want to cover the sandwich and turn the burner to simmer or possibly turn the burner off. The heat from the pan might be enough to keep warming the sandwich.

This sandwich was everything I thought it would be. The honey mustard gave it some zing and added a really great flavor. It was cheesy, creamy and very satisfying. So much in fact, I couldn’t finish. I did my best though. 


Saturday, February 16, 2013

Better Than Sex Cake with CARAMEL


You know we had to do it! We just couldn't stop ourselves, we had to add caramel to this already very good cake. It just wouldn’t be right if we didn’t.

Better Than Sex Cake with Caramel and Rolos
I’ve never made this cake. I’ve eaten it plenty, but never whipped one up myself. Two words. Pretty easy. Adding the caramel was an amazing choice. I’ve had the idea of a Lemon Better Than Sex Cake, but since our caramel party was approaching I thought why not do this one first. The lemon one will be coming in the next few months. I love me some lemon!

Back to THIS cake. Here's what you'll need:

(Adapted from: Barefoot and Baking)


Bake the cake as instructed on the box. Once cake is done, remove from oven and immediately poke holes into the cake. I used the handle of a wooden spoon. After making the holes, pour the sweetened condensed milk over the entire cake.

Let the cake cool completely. Let me tell you, this is a hard step! Having the scent of warm chocolate cake drifting into my nostrils and I can’t eat it… that's just down right painful. Patience and deep breaths… NO WAIT, don't take deep breaths! Deep breaths only makes it worse.

To resist the urge of eating the warm delicious cake, remove the Rolos from the freezer and crush them into small pieces. We’ll add this to the very top. If you use Heath pieces (what the original recipe calls for) you can buy them already crushed. Someone send a memo to the Rolos company about this genius idea, okay?

After the cake has cooled, add the caramel then the hot fudge. I warmed the fudge in the microwave for 50 seconds to make it easier to spread. It spreads very easily if it’s warm enough but don’t freak out if it lumps in some areas. I promise… this cake is hard to mess up.

Add Caramel
Spread hot fudge
Place the cake in the refrigerator until the fudge sets. It should be about 10 minutes.

Add the cool whip and the crushed Rolos.

So good! I can't even put it into words. It's really that good! It's rich so get a cup of coffee or milk.

And in other news: I told my husband I was making Better Than Sex Cake and added “but I’m gonna change it up a bit”. And… let’s just say he had a typical man comment and leave it at that. Men!?! Am I right?

Reminder: Tomorrow is the CARAMEL party on our Facebook page. Please stop by!

Friday, February 15, 2013

Caramel Party

Come one, come all! We're hosting a CARAMEL themed party on our Facebook page this Sunday. We look forward to sharing lots of new recipe ideas. If you love caramel, you don't want to miss this.

We don't care who you are, what stage of baker/chef you are... we just want you there. 


Thursday, February 14, 2013

Heart Shaped Biscuits w/filling


I have a special treat for everyone this Valentine’s Day.  It’s a mouthwatering, delicious treat. I’ve had this idea for a while but just hadn’t found time to make it. With my heart shaped cookie cutter in hand, I finally MADE time to bake up some Peanut Butter and Jelly Biscuits & Peanut Butter and Chocolate Biscuits. 

Here’s what you’ll need:

PB&J Biscuits

1 tube of Pillsbury biscuits (each biscuit cut in half, horizontal)
Peanut Butter
Jelly (any flavor)
Cooking spray (ONLY if your biscuit instructions call for it)

PB & Chocolate Biscuits

1 tube of Pillsbury biscuits (each biscuits cut in half, horizontal)
Peanut Butter
Chocolate kisses or stars or chocolate chips or Hersey’s chocolate bar or Nutella – any kind of chocolate that will melt nicely.
Cooking spray (ONLY if your biscuit instructions call for it)

Preheat oven to 375° or whatever the biscuit instructions tell you. Prepare a baking pan or cookie sheet with cooking spray, parchment paper or a baking mat.

Roll out the cut biscuits (by cut, I mean the biscuits sliced horizontally), just big enough to make a heart with your cookie cutter (we don’t want to waste too much of the biscuit). This recipe works well without the cutter too… just roll out to the thickness you desire. 


Carefully apply a spoonful of peanut butter to the biscuits. Repeat this step with jelly or if you’re going with chocolate, add as much or as little as you’d like. Take another heart shaped biscuit, place it on top of the filling and gently press the two biscuits together along the sides. This helps keep the filling inside the biscuit. 


Bake for about 10 minutes. 


With my scraps I made heart shaped biscuits without filling. 


The options are endless. You can get crazy creative with biscuits. I have tons of other ideas that I will be sharing with you over the course of this year. Eventually I plan to use homemade biscuits and what a delight it will be.