Thursday, July 18, 2013

Banana Jam

I was introduced to banana jam by the mom of my daycare kids, Jackie. She knocked this one out of the park. I begged her to share the recipe and she said YES! So here it is:


This, my friends, is ooey gooey toasty warm flavorful goodness!

Banana Jam

3 bananas, sliced very thin
1/3 cup water
1 cup sugar

Cook sugar (yes, sugar only) over medium heat until the sugar mostly melts and turns light brown. Add water. Adding the water may make the sugar hard, but don't panic. It will gradually dissolve. Add bananas and cook over low heat until there are little to no banana chunks.

Put jam in canning jars. If you don't have any canning jars, don't stress. Just put the jam in some tupperware containers and refrigerate. No worries on expiration dates... you'll go through it fast!

Jackie also brought us Thomas English Muffins. A limited edition... banana bread. Oh, I'm telling you these little delights are amazing. I topped my toasted english muffin with peanut butter and banana jam. Because of the banana bread english muffin and the banana jam, you might think the banana flavor would be overpowering, but it really isn't. It was a perfect blend of peanut butter, banana and english muffin.


Thursday, July 11, 2013

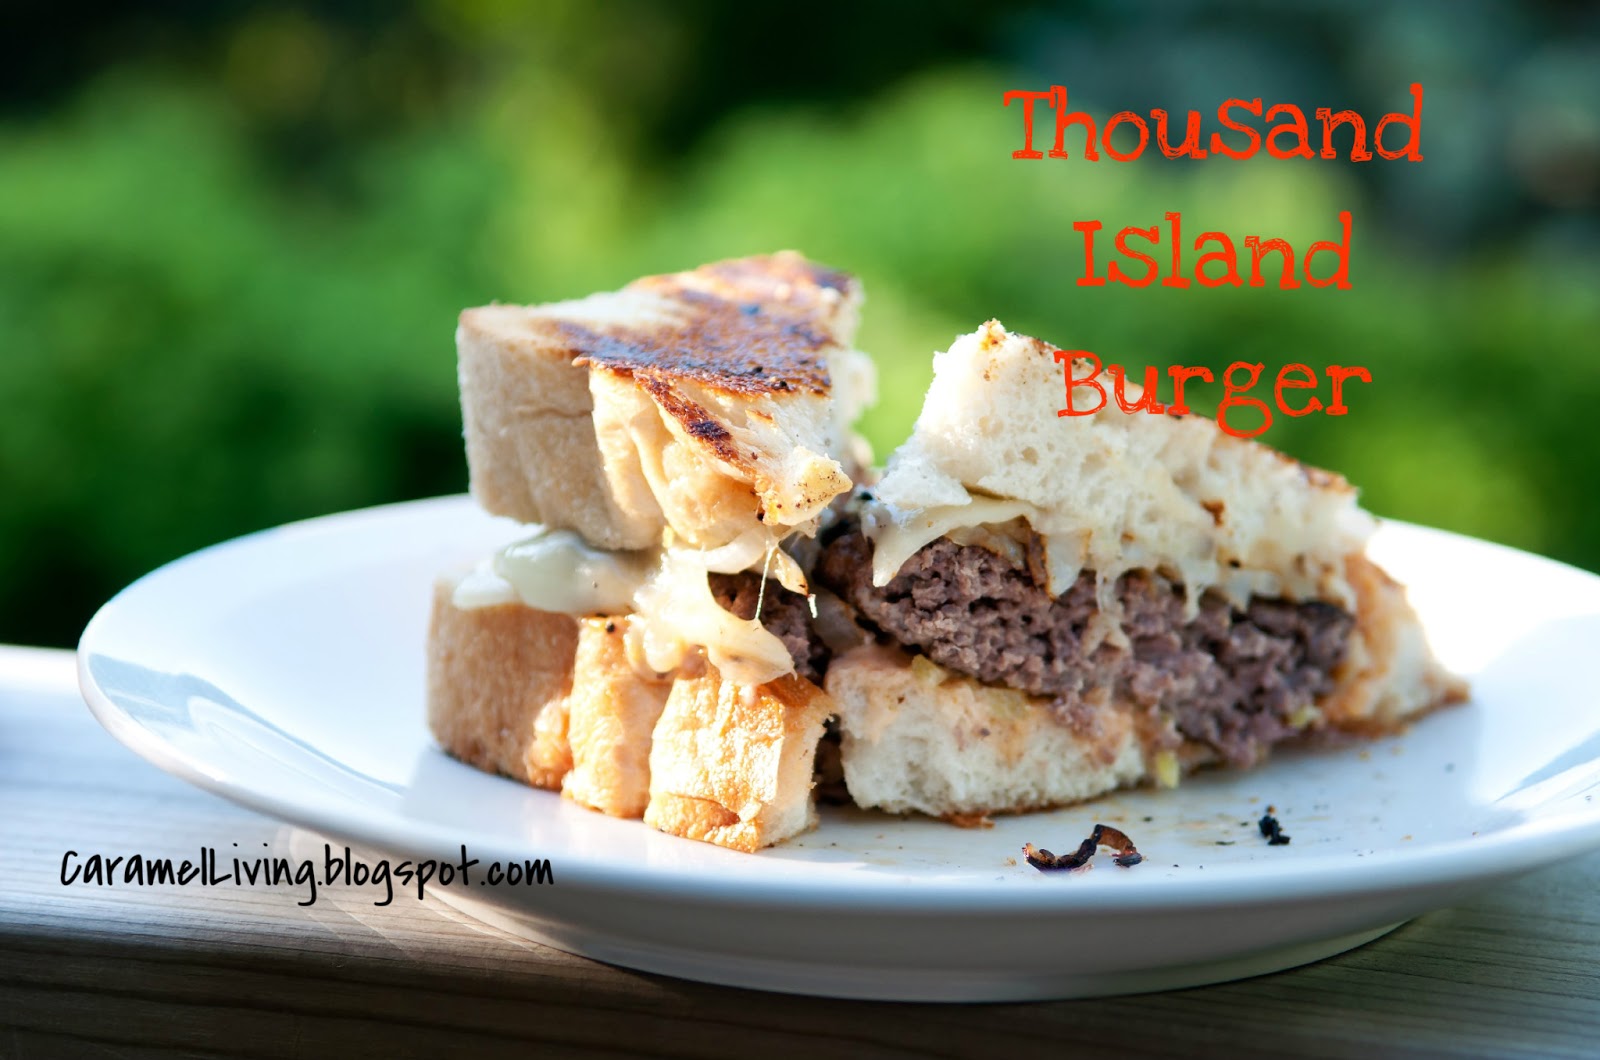
Thousand Island Burger

I'm not a huge fan of Thousand Island Dressing, but I do enjoy it on sandwiches and burgers. If it makes the sandwich messy, I'm sold! I'm still not able to fully understand my obsession with messy food, but I see it as a positive thing and I'm always assured by others that I am not alone when it comes to this obsession.

Today I have a delicious Thousand Island Burger made with a beef patty, fried onions, Swiss cheese, homemade dressing and sourdough bread. Much like a Patty Melt.


Thousand Island Dressing is made a few different ways. Some people add chopped eggs or Worcestershire Sauce. I went a little more bland with mine. I will definitely add Worcestershire sauce next time. The dressing was good as is, but the Worcestershire sauce would add a nice flavor.


Thousand Island Dressing (makes  1 cup):

½ cup mayo
¼ cup ketchup
¼ cup sweet relish (a little more, a little less, depending on your relish preference)
Dash of salt and pepper


Now to construct your burger:

Grill or fry up some beef patties. Fry some onions. Cut the sourdough into nice thick slices. Spread butter on one side of each slice of bread. Place one slice butter side down in a frying pan. Spread a generous amount of dressing on the bread. Place a slice of cheese on top of the dressing, add the grilled/fried patty, then the fried onions and then another slice of cheese. Finally, add more dressing to the second slice of bread. Place the slice, dressing side down & butter side up, to the burger. Cook the sandwich at a med-low heat for about 7 minutes, carefully flip it and cook for another 7 minutes.

Enjoy!

Monday, July 8, 2013

Oven Roasted Rosemary Chicken

Husband and I celebrated our 8th anniversary awhile back. It was on a Tuesday. Tuesdays aren't great for "date night". We had plans to go out on Saturday evening so it wasn't a huge deal to stick to our normal routine on our actual anniversary. On a normal Tuesday evening I would be headed to my kickboxing class and Husband would be hanging with the kids. This was the plan all day until about 3:00pm.

At 3:00pm, I thought "nope, I'm skipping class and making a nice meal for the fam". Because of the kickboxing class, I have missed out on many family dinners. I love having dinner with my family. Everyone sits at the table and complete chaos erupts... but I still love it. So I put my foot down and decided to play hooky.

Now it's 3:00pm and I want to prepare a special dinner for everyone. I run a daycare so I don't have a lot of time to spend prepping a meal. Oven Roasted Rosemary Chicken would be perfect!

What you'll need:

Chicken (breasts, legs, thighs, etc.)
Veggies (potatoes, green onions, carrots, etc)
rosemary (fresh or dried)
salt and pepper
Olive oil

I had chicken legs (Husband's favorite) and chicken breasts in the freezer. I thawed them in water for about 45 minutes. While they thawed I cut up potatoes and onions.

I prepared a baking pan with olive oil and preheated oven to 375. You don't want to cook the chicken too fast, it will dry out.

In the baking pan, I added legs to one side and the breasts to the other side. In the middle, I added the veggies. Then I sprinkled on dried rosemary and salt (I used sea salt) & pepper.


I covered it with foil and placed it in the oven at 4:00pm. At 6:00pm, I removed the foil and added about 2/3 cup of water. The chicken is done when it reaches 165 degrees.


This meal doesn't require a lot of maintenance and it is delicious! That's a win win, my friends.

We shared this at: Who Needs A Cape?

Thursday, June 27, 2013

Firecracker Cake


Looking for a fun dessert to make for your 4th of July festivities? A few years ago I made this Firecracker Cake for my friends' party at the lake and it was a huge hit!  What makes it so fun? The cake and frosting are multi-colored, but it is also topped with sprinkles and Pop Rocks!  Have the kids in your life been introduced to Pop Rocks? Mine thought they were amazing.

I actually made the cake from scratch but it didn't hold the colors well so I would recommend just using a box mix. 

*** Firecracker Cake ***
From Cooking with Sugar

1 box white cake mix
1 cup Greek yogurt
1 container whipped white frosting
Red and blue food coloring
Red, white and blue sprinkles
Pop Rocks candy (I found them at the dollar store)

Preheat oven and prepare cake mix according to cake mix directions. Add Greek yogurt and mix well. Grease a 12 cup bundt pan. Add red food coloring to 1 cup batter in small bowl. Add blue food coloring to 1 cup batter in a separate bowl. Pour red batter on the bottom of the pan, then pour white batter, and lastly pour blue batter in a circle around the middle of the pan. Do not mix! Bake according to directions, cool slightly and remove cake onto plate.  Let it cool completely before frosting.

Divide the frosting into 3 separate bowls. Warm one bowl of white frosting for 5-10 seconds in the microwave and drizzle over the cake. Warm second bowl, add red coloring, drizzle over cake and do the same with the blue coloring.  Top with sprinkles and Pop Rocks! If you are not serving the cake immediately, wait to add the Pop Rocks so your guests can get the full effect of the “firecrackers.” :) 

Have a sunny and safe holiday!


Sugar Cookie Sandwiches


Sparklers, celebration and food!! Fourth of July is such a great time of the year. We typically head over to my parents’ cabin for the Fourth. We swim, go for boat rides, eat and be merry. There is a Fourth of July boat parade which is a blast because a water fight with water balloons and water guns is bound to happen between the boats and viewers.

Fourth of July = FUN, yummy treats and more fun and more yummy treats!


Today I have a fun cookie, along with a kick butt frosting recipe, to add to your holiday menu. These cookies are cute, fun and delicious. Like I’ve mentioned, oh I don't know... a few hundreds time, I enjoy a soft and chewy sugar cookie. The recipe that follows will leave you with just that. 

Sugar Cookie Sandwiches

  • 2 ¾ cups all-purpose flour
  • 1 tsp baking soda
  • ½ tsp baking powder
  • 1 ½ cups white sugar
  • 1 cup butter, softened
  • 1 egg
  • 1 tsp vanilla

  • Blue food coloring
  • Red food coloring
  • Sprinkles
Preheat oven to 350. Prepare cookie sheet with a baking mat or parchment paper. 

Combine flour, baking soda and baking power in a bowl and set aside. In another bowl, cream together butter and sugar. Mix in egg and vanilla. Gradually add flour mixture to sugar mixture. I usually do this in three steps… add a bit of flour, mix well and repeat two more times.

Separate dough into two even halves and place them in separate mixing bowls. Add red food coloring to one half and blue to the other. I used about 1/2-3/4 tbsp of each color.


Roll dough into large blueberry size balls. Really you can make them any size but this size makes them easy to pop. And by pop I mean… into my mouth.  Roll the small balls in sugar sprinkles and place on the prepared cookie sheet. 


Bake cookies for about 3-5 minutes, remove from oven and let them rest on the cookie sheet for another 2 minutes. I take my cookies out of the oven while they are still quite soft looking. They will continue to “bake” a little longer as they rest. (Note:  If you enjoy a crisp cookie, bake them a little longer)

These little guys are about the size of a quarter
Once the cookies are completely cool we can build our sandwiches. This frosting is amazing and very versatile. It can be used on cakes, cupcakes, cookies, you name it. It's light and creamy, but also sets very nicely and doesn't run like other whipped frostings I've tried. If you are looking for a new frosting recipe, here it is!


Whipped Cream Frosting (original recipe) :

1 8oz cream cheese, softened
1/4 cup white sugar
1/2 tsp vanilla extract
1/4 tsp almond extract
1 cup heavy cream

Blend together cream cheese, sugar, vanilla extract and almond extract. Once the texture is creamy slowly whisk in heavy cream. Whisk until it reaches a stiff peak. I whisked mine for about 6 minutes.


To build the sandwiches, take one cookie and apply frosting to the top. Take another cookie and gently press the bottom side down on to the frosted cookie. There you go. Your cookie sandwich is complete.


You can eat these cookies right away or chill them. I like them better chilled.


Since I didn't 100 mini size cookie sandwiches I made some larger ones too. I combined one red doughball and one blue doughball.


 As they baked they attached to one another giving me these:


The kids LOVED these. Even more than the cookie sandwiches!


Enjoy!

Tuesday, June 18, 2013

Stuffed Peppers w/ground chicken

I remember attending a work party in my late teens. The host prepared the best(!) stuffed peppers. Although the party was almost 20 years ago, I still think of these peppers. I finally took charge and decided to make them myself. I figured it wouldn't be a complicated recipe, something similar to Porcupine Meatballs smushed into a pepper.


Easy Stuffed Pepper Recipe

4-6 large green peppers
1 lbs ground chicken
1 small-medium onion, chopped
1/2 cup brown rice, cooked
1 can (14.5oz) diced petite tomatoes
1 cup tomato juice or water
1 tbsp chicken broth seasoning
1 tsp tarragon leaves
½ tsp black pepper
2 eggs
Shredded cheddar cheese

Rinse peppers and remove the tops and seeds. Set peppers in a baking dish.
  
Preheat oven to 350.

In a bowl, stir together rice, onions, tomatoes and juice. Add seasonings and mix well. Add ground chicken into rice mixture. Mix in eggs, one at a time.

Now you are ready to stuff the peppers. Spoon mixture into the peppers.


Bake in oven for 50-60 minutes or until the middle reaches 160.  Top with cheese and bake an additional 5-7 minutes.


Enjoy!


Friday, June 14, 2013

Peanut Butter S'More Pizza


Continuing the peanut butter love, I'm sharing a recipe that I have made since I was little. I have no idea where I found this recipe when I was a young squire but it is definitely a keeper if you love peanut butter and chocolate...which we do. Peanut Butter S'more Pizza is made with a peanut butter cookie crust with marshmallow and chocolate chip toppings. It is so simple...nothing gourmet going on here...but it is oh so good. You'll see my 6 yr old helper in the pics and it warms my heart to think that perhaps she will someday share this easy recipe with her children.

Peanut Butter S'More Pizza
1/2 c. sugar
1/2 c. brown sugar
1/2 c. butter, softened
1/2 c. peanut butter (either creamy or chunky)
1/2 t. vanilla
1 egg
1 1/2 c. flour
1 1/2 c. mini marshmallows
1 c. chocolate chips

Preheat oven to 375 degrees. Combine sugar, brown sugar, butter, peanut butter, vanilla, and egg in bowl and blend well. Add flour and mix. Spread on pizza pan - we used my Pampered Chef stone.


The thicker you leave the dough, the thicker the "crust" will be. Try to spread the dough evenly so it cooks evenly. Form a rim on the edge and bake for approximately 9-10 minutes. Do not brown. Take the crust out of the oven and carefully sprinkle the marshmallows and chocolate chips on the crust.


Bake 5-8 minutes more until the marshmallows are puffed and lightly browned. Cool, cut just like a pizza, and enjoy!