Showing posts with label Caramel Living. Show all posts

Thursday, May 8, 2014

Egg Benedict Breakfast Pizza

The.Best.Breakfast.Pizza.Ever.... seriously!


What you'll need:

1 tube of pizza crust
4 eggs, scramble
Canadian Bacon, deli ham or cubed ham
Salt and pepper
1 cup Cheddar Cheese
1 cup Mozzarella Cheese

Hollandaise Sauce:

4 egg yolks,reserve egg whites for pizza
1 stick of butter
2 tbsp lemon juice
1/4 tsp paprika
1/4 - 1/2 tsp black pepper

To prepare the sauce:

Melt one stick of butter in microwave. In a separate bowl, add 4 egg yolks. Set the unused egg whites aside. We'll scramble the whites later. Add lemon juice, paprika and pepper to yolks and whisk until smooth. Slowly whisk in melted butter. Whisk together until well combined. Set aside.

Pizza:

Preheat oven for whatever the crust calls for.

Unroll the pizza crust. Press the crust to your desired thickness on a greased baking pan. Spread the sauce on the pizza crust. Scramble 4 eggs along with the 4 egg whites set aside from the Hollandaise sauce. Add scrambled eggs and ham to pizza, and sprinkle on salt and pepper. Top the pizza with cheese. I also suggest adding some veggies - onions, peppers, mushrooms, etc.

Bake for 15 minutes or until cheese is melted. 


Wednesday, February 12, 2014

Honey BBQ Chicken Strips

One of mine and my daughter's favorite appetizers is Boneless Honey BBQ Chicken Strips from Applebee's. The sauce is just perfect for us. My husband loves Parmesan Garlic Wings from Buffalo Wild Wings. So for the Superbowl we decided to attempt at-home versions of both flavors. Unfortunately, my husband's recipe was a flop, but the BBQ strips turned out perfectly. Not exactly like Applebee's, but we were good with that because this sauce was really great. It was tangy and sweet.

The strips we chose were Tyson Crispy Chicken Strips, I'm telling you... they are just right for this sauce. We had leftover sauce and strips so I had this meal for lunch 2 days in a row. Just thinking about them now makes me crave them. These little sweeties will leave your tastebuds yearning for more. You'll be totally set with ranch or bleu cheese dipping sauce and a small side of slaw or these delicious homemade potato chips.


Let's get saucy...

Honey BBQ Sauce

1/4 C brown sugar
1/2 C + 2 tbsp BBQ (I used Sweet Baby Ray's)
1/4 C water
1 tbsp honey

Mix everything together and the sauce is ready to go!

Bake the desired amount of strips. The quantity of sauce was enough for the entire bag. We only made about of the half the bag and baked the rest when we ready to eat more. I like my strips extra crispy so I always bake them longer than the bag recommends.

Once your strips are done, give them a honey BBQ bath. Flip 'em and flop 'em around in the sauce.


 Now you are set to sit down and enjoy some tasty, tasty Honey BBQ Chicken Strips!!


Tuesday, February 4, 2014

Homemade Chips with Onion Dill Dip

Have you ever made your own chips? If you haven't, you really need to add it to your to-do list. They are amazing. I made them for the first time in December and have made them 3 times since then. It's pretty easy to do. Sure there are a few steps, but all in all, they are quite easy. And oh man, so delicious. You can make as little or as much as you like. The crispness and salty taste...yum, so satisfying. Be careful though... like the traditional saying goes "bet you can't eat just one" and that's very true for these chips. Once you add the dip - oh mama! Hold on! The dip is creamy and bursting with flavor. It's not an overwhelming onion/dill flavor. It's just right.


Let's get started...

Ingredients (copycat from Lauren's Latest):

4 large Russet Potatoes
A large bowl of cold water
2 pints peanut oil (vegetable oil works too)
Sea salt

Dip :

1/2 cup sour cream
1/2 cup mayo
1/4 cup finely chopped yellow onion
1/2 tsp dried dill 
Salt and pepper to taste

Grab your mandoline. I found a nice one at WalMart for $15. If you don't have one, you can slice them by hand too. It's just more work and takes more time.


Take a potato and start slicing. I like how the original blogger said "don't be a hero - use the guard". Made me chuckle so I'm bringing you her words of wisdom. Anyone else start singing "Biiilllyyy, don't be a hero". No? Just me. My parents had that song on the jukebox. I love that song.


Once you have the potatoes sliced, soak them in cold water for 30 minutes. This step removes most of the starch. It makes the chips light and crisp when we cook them.

While they soak, start making the dip.

Combine all ingredients, stir together and put in the fridge. Yeah, I know. Easy, huh?

Also, let's start heating up that peanut oil. Add the oil to a large skillet. Turn stove dial to high-medium.

When the potatoes are done with their cold bath, drain the water and dry them well. Water and oil don't mix well. We don't need any unnecessary burns.


Prepare a pan with a napkin and get your sea salt ready. Oh... we're so close to the goodness right now!


Let's start cookin'!


Take a handful of potatoes and drop them carefully into the oil. The chips should "dance" around in the hot oil. If things get crazy and oil is sputtering out of the pan, turn the heat down. They should start turning a darkish shade of brown in about 5-7 minutes. Note: if you like darker chips go a minute or two longer... lighter chips, cook a minute or two less.


Remove the chips from the skillet with a slotted metal spoon and place them in the pan you prepared with a napkin. Sprinkle on some sea salt right away. Sneak a chip. Go ahead, sneak another - I won't tell!

Grab the dip! The time has come to dive in.


Sunday, January 12, 2014

Slow-cooked Salsa Chicken Enchiladas

Like Mexican food? Great! You'll love this recipe then! It's basically your typical enchilada only amped up A LOT. It's creamy, cheesy and tasty.


Salsa Chicken Enchiladas

1 lb chicken, cut into large chunks
8oz cream cheese
½ cup cheddar cheese, cubed
1 jar of salsa, after poured into crockpot fill jar about ¾ of the way with water and add to crockpot
¼ tsp cumin powder
½ tsp onion powder
½ tsp garlic powder
1 tsp minced onion
Black pepper to taste

Handful green onions, chopped
Handful cilantro, chopped

8 Flour tortilla shells
2 cups Cheddar cheese, shredded
Sour cream

In a crockpot, combine chicken, cream cheese, cubed cheese, salsa, water and spices. Cook on low heat for at least four hours or until chicken is cooked thoroughly. Remove chicken chunks from sauce and shred. Return shredded chicken to sauce and continue to cook on low for another hour or so.

When you are ready to make the enchiladas, cut up the green onions and cilantro. Add to chicken mixture.


Preheat oven to 375. Set aside a 9x13 baking pan.

With a slotted spoon, add a spoonful or more of the chicken mixture to one side of the flour shell. TIP: let the sauce run through the slotted spoon before adding it to the shell.


Roll the shell and place into the pan. Make 8 rolled shells. Pour the remaining sauce and chicken over the rolled shells.


Sprinkle shredded cheese on top.


Bake for 25-30 minutes or until cheese is melted.


 My slow-cooked refried beans are the perfect side this Mexican dish. Top beans and enchiladas with sour cream and you are good to go. You’ve got yourself a good gut-stuffin' plate of deliciousness.

Tuesday, January 7, 2014

Chicken Cordon Bleu Casserole (Pinterest Copycat)

I'm sure a lot of people have seen this pin on Pinterest. It's been pinned/repinned about a bazillion times. The pictures made me drool so I added the recipe to the top of my must-try list. I finally got around to making it last night. I cut the recipe in half because I knew my boys would reject the meal. They just don't understand good food sometimes.


This meal was very tasty. It was creamy and quite filling. I might play around with the sauce a little next time. While it was good, I think it could be even better with a few tweaks. For example, I think a sauce similar to Alfredo would be great!

Chicken Cordon Bleu Casserole (adapted from Tasty Kitchen)

1 lbs chicken, slow-cooked or boiled then shredded
1 can chicken broth

10-12 slices very thin honey ham
5-6 slices thin baby swiss cheese

For sauce:
2 tbsp butter
3 tbsp flour
2 cups milk
1 tbsp fresh squeezed lemon juice
1/2 tbsp Dijon mustard
3/4 tsp salt
1/4 tsp smoked paprika
1/8 tsp ground white pepper
1/4 garlic powder
2 tbsp sour cream

For topping:
3 tbsp butter
2/3 cup panko crumbs
1/3 tsp season salt
3/4 tsp dried parsley
(next time I would double this)

Clean and trim chicken. Cut chicken into chunks. Add it to the crockpot along with the broth and cook for 4ish hours. Shred the chicken once it is fully cooked.

Preheat oven to 350. 

Add chicken to baking pan. Cover shredded chicken with some broth. Just enough to wet the chicken.

Add a layer of ham, tear it up a bit first.

Add cheese.

For the sauce:

Melt butter in saucepan. Add flour and stir well. Slowly add milk. Stir until flour mixture is well combined. Add lemon juice, mustard, salt, paprika, white pepper and garlic. I split the original recipe in half and then being the absent-minded person I am, I forgot and added the full 1/2 tsp of smoked paprika. Doh!!!! To fix this I added sour cream to the sauce before pouring it over the cheese. I think it really added a creamy texture and will do it again when I make this dish in the future (I'll also use the correct amount of paprika).

Again, if you follow the recipe correctly, your sauce won't be this orange
Pour sauce over cheese.

For topping:

I also split the recipe for the topping in half. I thought it wasn't enough topping though so I would definitely double this recipe next time. Melt butter in microwave for 45 seconds or until melted. Add Panko crumbs and seasonings. Stir together and sprinkle over sauce.

Add the Panko topping


Bake dish for about 45 minutes. Eat, enjoy and get a full tummy. 

Monday, January 6, 2014

Banana Blueberry Muffins


Banana Blueberry Muffins (adapted from: The Live-in Kitchen)

7 tbsp butter
1/3 cup milk
2 large eggs
1 tsp vanilla
1 1/2 cup flour
1/4 cup sugar
1 1/2 tsp baking powder
1/2 cup fresh blueberries
2 or 3 overripe bananas, smashed

Crumble topping:

3 tbsp butter, cold
1/2 cup flour
3 tbsp brown sugar

Preheat oven to 375. Prepare a muffin pan with muffin/cupcake cups.

I followed Lindsay's instructions on how to brown the butter:

Melt the butter in a small saucepan over medium heat. It will melt, froth, and begin to crackle. The crackling will subside and the butter will froth again and begin to brown. Remove from the heat when the butter solids become a medium brown color and the butter smells slightly nutty. Immediately pour hot butter into a small bowl to prevent further cooking and burning. 

In a small bowl, stir together milk, eggs and vanilla. Add the melted butter to the milk mixture. 

In another bowl, hand-mix together flour, sugar and baking powder.  Make a flour well by making a hole in the middle of the flour. Pour the butter mixture into the hole and gently fold it all together. Mix by hand to avoid over mixing. Gently stir in smashed bananas and blueberries. 

Pour mix into the prepared muffin cups. For the crumbly topping, combine butter, flour and brown sugar. Squish the ingredients together with your fingertips. Sprinkle the topping on each muffin.

Bake muffins for about 18-20 minutes. To get a nice lift on your muffins avoid opening the oven for at least 10 minutes. Muffins are ready when a toothpick inserted into the middle comes out clean. 


Thursday, January 2, 2014

Cheeseburger Soup

My friend, Kristal, raved about this cheeseburger soup recipe the other day. Since we're in the bitter cold winter season I figured I needed to give it a go. Here in the Midwest, life has been colder than necessary. I can handle snow, I'll even go so far to say I love snow, but when we have days and days in a row of below zero temps (that's below zero in Fahrenheit, people. Just for fun, if it's -2F that would be almost -19C).... let's be honest, Mother Nature, that's taking it a bit too far. This is the kind of weather that chills you to the bone and the only way to really thaw out or warm up is live in a Snuggie.


Needless to say, soup is excellent on a cold winter's day. A few weeks ago, my husband made an awesome Baked Potato soup and we ate it out of bread bowls. Talk about yum! I think I'll ask him to make it again and we'll do a post about it. Sometimes that man can really surprise me with his culinary skills.

This recipe for Cheeseburger Soup is great. It's hearty but yet light enough you don't feel like a cement statue after you've gobbled it down. Another great thing about soup is that you can add or take away any ingredients you want. Making adjustments is very easy and also suggested, make it to your family's likeness.

1 lbs ground beef, turkey or chicken
3/4 cup carrots, sliced
1/2 cup green onions, chopped
3/4 cup celery (we opted out)
6 small-medium unpeeled potatoes, diced
1 tsp basil
1 tsp parsley
5-6 cups chicken or vegetable broth
2 tbsp butter, melted
1/4 cup flour
8 oz shredded cheese (we used cheddar)
1 1/2 cup milk
Salt and pepper, to taste

1/4 cup green onions, chopped
Sour cream, optional

In a stockpot, add ground meat, onions and carrots. Cook together until veggies are tender. Stir in basil and parsley. Add potatoes and broth, bring to a boil and then simmer until potatoes are tender. Mix the melted butter and flour in a separate bowl. It's a goopy glob but don't panic. Add this glob to the soup and stir well until soup begins to thicken. It doesn't thicken too much. If you are looking for a thick soup, reduce the broth from 5-6 cups down to 3 cups. After the flour has been stirred in, add cheese, milk and salt and pepper. If you haven't already, reduce heat to low so the milk doesn't curdle. Allow the cheese to melt and it's ready!

Serve with a dollop of sour cream, sprinkle with green onions and add slice of french bread.

Tuesday, December 24, 2013

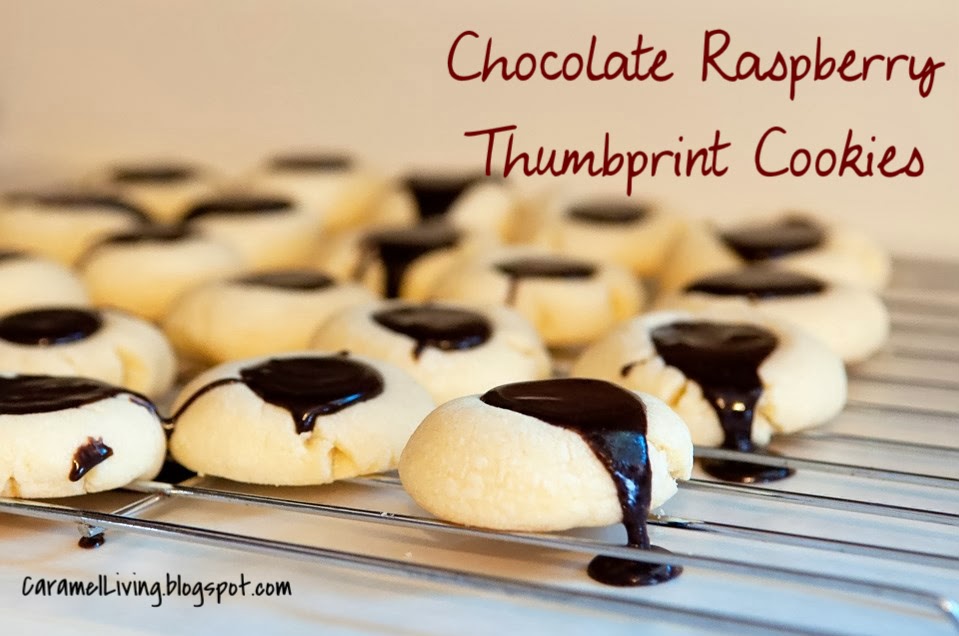
Chocolate Raspberry Thumbprint Cookies

I love myself some thumbprint cookies. Like... I really really love them. The texture is just right, they are soft and crumbly. The taste of the cookie is simple yet very delicious. The little bit of almond extract adds a perfect little perk to these delights. Once you add your melted chocolate to the top... hold on to your shorts, toupees, glasses or whatever else you don't want flying off your body. Yes, they are that good.


So here we go...

Cookies (adapted recipe from here):
1 cup butter
1 cup powdered sugar
2 egg yolks
1 tsp vanilla
1/2 tsp almond extract
2 1/4 cup flour
1/2 tsp baking powder
1/4 tsp salt

Melted chocolate topping:
1 cup dark chocolate raspberry baking chips
4 tbsp heavy whipping cream


Cream together butter and powdered sugar until the texture is smooth. Add egg yolks, vanilla extract and almond extract. Mix well. In a separate bowl combine flour, baking powder and salt. Slowly add the flour mixture to the butter/sugar mixture.

Preheat oven to 350 and prepare a cookie sheet by using parchment paper or by spraying the sheet with a light coating of cooking spray.

Roll dough into small balls, about 1 inch. Place on cookie sheet and press a small indent into the dough ball. Use your thumb or the handle of a wooden spoon.

Bake cookies for 10 minutes. Remove from oven and let them rest on the pan for a minute or two before moving them to the cooling rack.

For the topping, combine chips and cream together in a microwaveable bowl. Start by microwaving the two ingredients for 1 minute. Remove and stir together. Keep microwaving until the chocolate has a smooth texture.

I let the cookies cool for about 45 minutes before adding the chocolate. I waited 2 seconds, maybe less, to eat one. The chocolate eventually hardens but I can not resist eating at least one cookie with all of its melted chocolate goodness. I used a spoon to drip the chocolate into the indent of the cookie. Another way is to pour the chocolate into a Ziploc bag and cut off a small corner and squeeze the chocolate onto the cookie.


Thursday, December 5, 2013

Peppermint Hot Cocoa Blossoms

Do love a good chocolate and peppermint candy cane combination? If so, these cookies are exactly what you have been looking for! A chocolate cookie topped with a Candy Cane Hersey's Kiss. They are like little drops of deliciousness.


Don't like mint? No worries, I am not much of a fan either. I make mint goodies because I know my family and friends enjoy it. So if you're not diggin' the mint... try substituting a Hug Hersey's Kiss or maybe a Caramel Hersey's Kiss. Top it anyway you like it. Go ahead and be creative.

Peppermint Hot Cocoa Blossoms

2 cups flour
1/4 tsp baking soda
1/4 tsp salt
1/3 cup cocoa
1/2 cup (1 stick) butter, softened
1 cup sugar

1 egg
1 1/4 tsp vanilla
2 tbsp milk

1 bag Candy Cane Hersey's Kisses
Small bowl of powdered sugar

Add flour, baking soda, salt and cocoa together in a medium mixing bowl. Cream together sugar and butter. Add the egg. Mix well. Add vanilla. Mix well. Add about 1/2 of the flour mixture to the sugar mixture and mix. Add 1 tbsp of milk as it mixes. Add the remaining flour mixture and mix. Add in last tbsp pf milk as it mixes.

The dough is very easy to play with and doesn't require any refrigeration to firm it up. Roll dough into 1 inch balls. Roll balls in powdered sugar and bake for 8-10 minutes. Remove cookies while they are still soft and let them rest for 2 or 3 minutes. Add the Candy Cane Kiss and move to a cooling rack.


I also made these cookies without the chocolate. The ingredients and instructions are exactly the same except the addition of cocoa powder and instead of powdered sugar I used red sugar sprinkles. This recipe is on the back of the Candy Cane Kiss bag.


Monday, November 25, 2013

Snickerdoodle Scones

I've got Snickerdoodle stuck on my brain lately. It's just that it is such a wonderful combination. Wonderful I tell you.


The best part of eating scones are when they are still warm enough that the butter pieces burst a little in your mouth with each bite.


Scones
2 cups flour         
2 Tablespoon sugar
1 Tablespoon baking powder
1 teaspoon salt

1/2 teaspoon ground cinnamon (I actually did not measure this, I just added what I felt was good)
1 ½ sticks of cold unsalted butter, diced
2 eggs, lightly beaten
1/2 cup cold heavy cream
1/2 teaspoon vanilla


Sugar Topping
1/4 cup sugar
1 teaspoon cinnamon
butter, softened

White Chocolate Frosting
1/2 White Chocolate Chips
1 tablespoon shortening 

Preheat the oven to 400 degrees and line a cookie sheet with parchment paper or baking mat.

Butter 'em

Combine the dry ingredients into a large mixing bowl. Stir together. Add diced butter to the bowl and use a stand mixer to mix (on a low speed) until the butter is in pea sized pieces, about 6-7 minutes. Combine the cream, vanilla and eggs in a measuring cup and slowly pour into the butter/flour mixture. Mix just until everything is incorporated. Don't over mix.

Sugar 'em
Grab the dough and roll it out (shake some flour on the dough if it’s sticky). I rolled my dough to a generous thickness. These puppies don’t rise much, a little less than twice the size of the uncooked dough. Use a cute cookie cutter or cut the dough into a traditional scone (triangle) shape.

In a small bowl, stir together sugar and cinnamon. Spread butter on each uncooked scone. Put the scone butter side down into the sugar/cinnamon and press gently, evenly adding sugar/cinnamon to the scone.
Get ready to bake 'em
Put the scones on the prepared cookie sheet and bake for about 20 minutes. Check scones at about 15 minutes. Place scones on a baking rack to cool. 

Cool 'em
In a measuring cup or bowl combine chocolate chips and shortening. Place in the microwave for 45 seconds or until stirring makes it creamy. Careful not to burn. Spread chocolate on scones or place in a ziploc bag to make zigzags on top of the scones. I started out using the ziploc bag trick but blew a huge hole in the bag. Just call me Hulk. 

Drool a little

Eat 'em
 Enjoy!